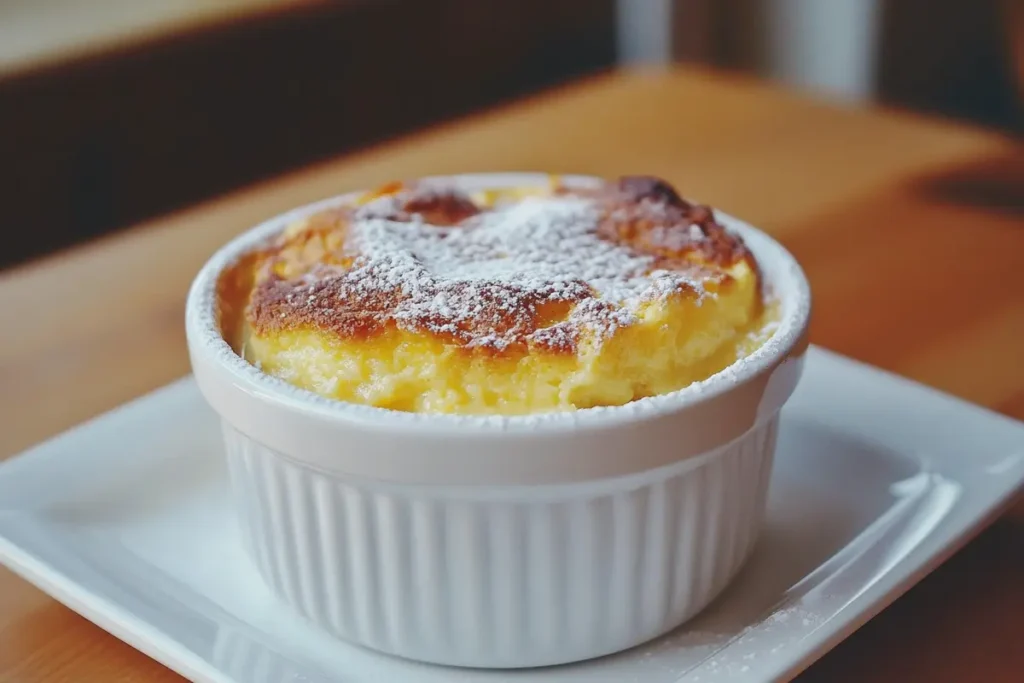
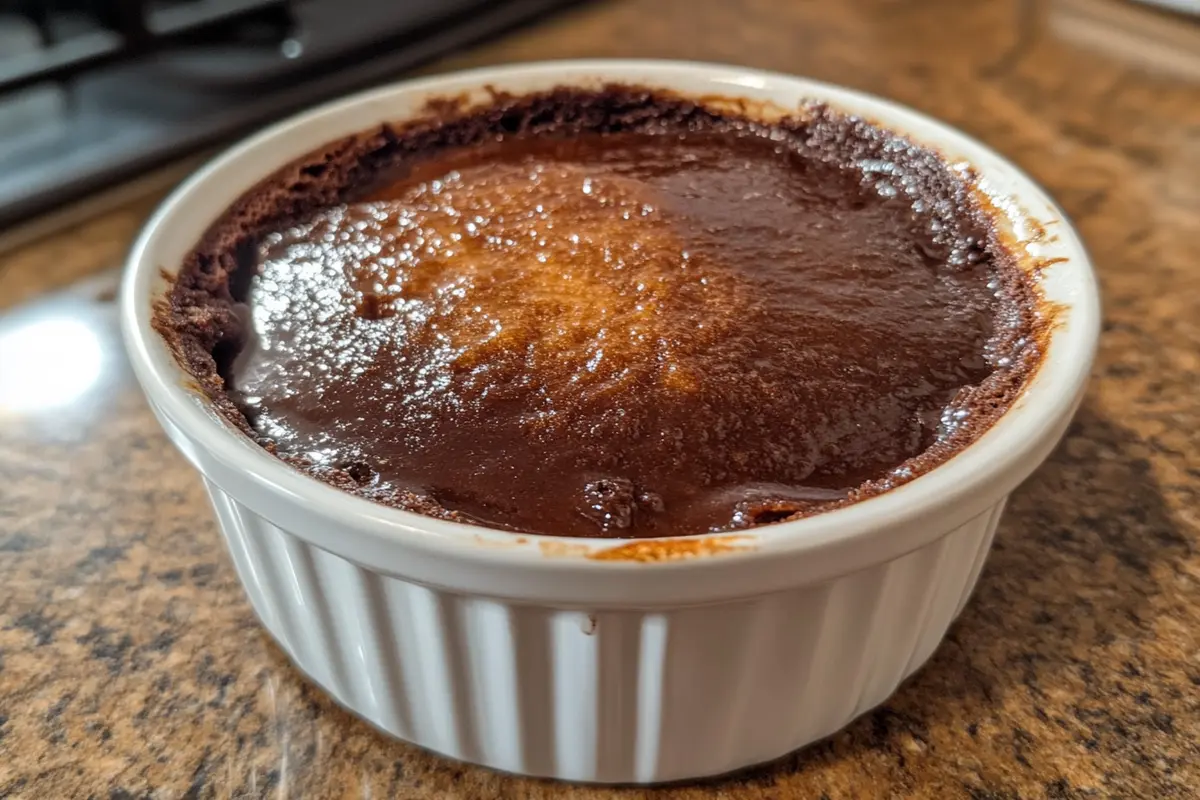
At its core, self-saucing pudding is a dessert that performs a little culinary magic. Why is it called self-saucing pudding? As it bakes, this dish separates into two distinct layers: a fluffy sponge cake on top and a rich, saucy layer at the bottom. This transformation happens without any stirring or additional steps during cooking, making the name perfectly descriptive—it sauces itself!
The pudding is known for its comforting texture and flavor. While chocolate self-saucing pudding often steals the spotlight, other variations, like zesty lemon or vanilla, bring their own charm to this delightful treat. Each variation retains the two-layer magic that defines the dessert.
Origin of the Name
The name self-saucing pudding highlights the dessert’s remarkable baking process. As it cooks, a chemical reaction between its carefully layered ingredients creates the signature sauce layer beneath the sponge. The name is more than just a description; it’s a promise of indulgence!
Historically, this concept likely stems from traditional British steamed puddings, where thick syrups or custards would accompany the sponge. Over time, these puddings evolved into baked versions, making them quicker and easier to prepare while still retaining that luscious, saucy base.
This combination of simplicity and surprise is why self-saucing puddings have remained a beloved dessert across generations.
Historical Background
The Evolution of Puddings to Self-Saucing Desserts
The word “pudding” has a rich and varied history, evolving from something quite different than the desserts we know today. Originally, puddings referred to savory dishes, often made with meat and grains. These hearty meals were steamed or boiled in a cloth bag, resulting in the dense textures commonly associated with traditional British puddings.
As culinary practices advanced, sweet versions began to take center stage. Ingredients like dried fruits, spices, and sugar transformed the concept of pudding into a dessert. By the 17th and 18th centuries, sweet steamed puddings became a staple in British cuisine, loved for their warm, filling nature.
Over time, baking replaced steaming as a more convenient method, leading to the lighter, spongier puddings we recognize today. While traditional puddings like spotted dick and treacle pudding maintained their prominence, innovative variations, including self-saucing pudding, emerged to captivate dessert enthusiasts worldwide.
How the Self-Making Pudding Concept Emerged
The invention of self-saucing pudding was a game-changer in dessert-making. This clever idea used simple ingredient layers to create its own sauce while baking—something not seen in older pudding recipes.
While the exact origin of self-saucing pudding isn’t clear, it likely became popular in the mid-1900s. During this time, people were looking for quick and easy desserts that still tasted delicious.
The growing use of baking powders and other rising agents made it easier for home cooks to make lighter, fluffier puddings without much hassle. This dessert quickly became a favorite for family meals and special occasions. Today, chocolate self-saucing pudding and other flavors are loved for their warm, comforting appeal, bringing joy to kitchens everywhere.
Culinary Science Behind the ‘Self-Saucing’ Effect
Ingredient Interactions
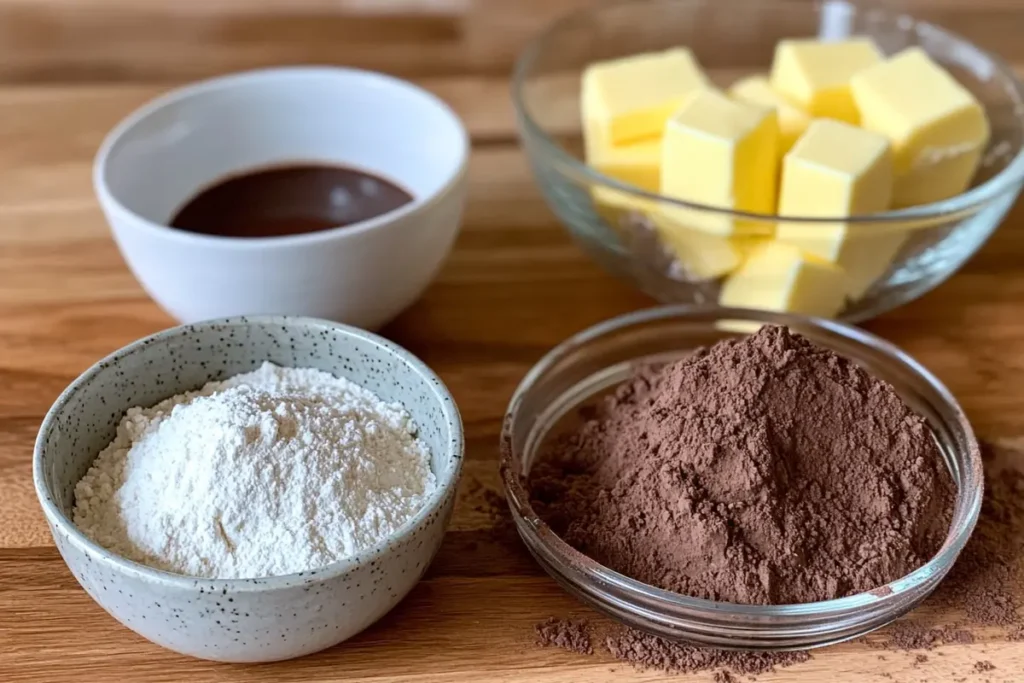
The magic of a self-saucing pudding starts with simple, well-chosen ingredients. Flour, sugar, butter, milk, and eggs combine to make the sponge layer. For flavor, cocoa powder or citrus juice is added, and baking powder helps the batter rise.
The sauce forms by pouring a liquid, like water, milk, or fruit juice mixed with sugar, over the batter. As it bakes, the liquid sinks through the sponge, mixing with sugar and other ingredients to create a rich sauce underneath.
This happens because sugar holds moisture, and the liquid’s weight pulls it down as the sponge bakes and sets. This clever process gives the pudding its signature two layers.
Baking Process and Sauce Formation
When the pudding enters the oven, heat activates the ingredients in specific ways. The sponge layer at the top rises and sets first, thanks to the leavening agents. Below this, the liquid heats up, combining with the sugar to create a thick sauce.
Temperature plays a crucial role in this transformation. The sponge needs just the right amount of heat to rise without overbaking, while the liquid must remain fluid enough to form a sauce. This balance ensures the dessert has both a fluffy top and a gooey bottom.
Timing and layering are equally important. If the batter and liquid aren’t proportioned correctly, the pudding might become too dry or fail to form a sauce. Achieving the perfect self-saucing pudding is as much about precision as it is about indulgence, making it a dessert that both challenges and rewards home bakers.
Delicious Variations of Self-Saucing Dessert Recipes
Chocolate Self-Saucing Pudding
If there’s one variation that stands out as the crowd favorite, it’s undoubtedly chocolate self-saucing pudding. Rich, indulgent, and irresistibly gooey, this version combines the comfort of chocolate cake with the decadence of molten chocolate sauce. Its deep flavors come from cocoa powder in the batter and an additional layer of cocoa-infused liquid poured over the top before baking.
The contrast between the fluffy sponge and the luscious, chocolatey sauce is what makes this dessert iconic. Served warm, it’s often paired with vanilla ice cream or whipped cream to balance the richness. This classic dessert has become a staple for cozy nights and family gatherings, providing a perfect example of how simple ingredients can create something extraordinary.

Lemon Self-Saucing Pudding
For those who prefer a tangy twist, lemon self-saucing pudding offers a refreshing alternative. With its zesty flavor and vibrant yellow hue, this version brightens any dessert table. The batter is infused with lemon zest and juice, giving it a light and airy sponge, while the sauce layer below bursts with citrusy goodness.
This pudding is ideal for spring and summer months when lighter, fruitier desserts are in demand. It pairs beautifully with fresh berries or a dollop of cream, making it a versatile option for dinner parties or casual meals. Its balance of sweet and tart notes ensures that it pleases even the most discerning palates.
Mastering the Art of Easy Self-Saucing Recipes
Essential Ingredients
Creating a perfect self-saucing pudding begins with the right ingredients. While variations in flavor call for slight adjustments, the basic components remain consistent. Here’s what you’ll need for most recipes:
- Flour: Provides structure to the sponge layer.
- Sugar: Sweetens both the cake and sauce while aiding moisture retention.
- Butter: Adds richness and contributes to the soft texture.
- Milk: Moistens the batter and aids in creating the sauce.
- Eggs: Act as a binding agent, giving the sponge its lift.
- Leavening agents: Baking powder or self-raising flour ensures the batter rises.
- Flavor additions: Cocoa powder for chocolate variations, or lemon juice and zest for citrus versions.
Optional ingredients like vanilla extract, spices, or even shredded coconut can elevate the flavor further. Using fresh, high-quality components is crucial for achieving the best results.
Step-by-Step Guide to a Self-Making Pudding
- Preheat the Oven: Set your oven to 350°F (180°C) to ensure even baking. Grease a baking dish to prevent sticking.
- Prepare the Batter: In a mixing bowl, combine flour, sugar, and any flavor additions like cocoa or lemon zest. Add melted butter, milk, and beaten eggs, stirring until smooth. Pour the batter into the greased dish.
- Layer the Sauce: For the sauce, mix sugar and the liquid component (like hot water or milk) with additional flavoring. Gently pour this mixture over the batter, using the back of a spoon to distribute it evenly.
- Bake: Place the dish in the oven and bake for 30–40 minutes, or until the sponge is set but the sauce is still bubbling below.
- Cool Slightly and Serve: Allow the pudding to cool for 5–10 minutes before serving. This ensures the sauce thickens slightly while remaining oozy and irresistible.
Mastering these steps guarantees a self-saucing pudding that’s both visually impressive and deeply satisfying. Serve it warm, and watch your guests savor every bite!

Serving Suggestions and Accompaniments
Ideal Serving Temperatures
Self-saucing puddings taste best when warm, as the soft sponge and gooey sauce are at their finest. Serving them straight from the oven keeps the sauce runny and gives that perfect molten texture. However, let the pudding rest for 5–10 minutes to allow the layers to settle while staying warm and delicious.
You can also serve the pudding at room temperature, though the sauce may get thicker as it cools. For leftovers, reheating is a must. Heat single portions in the microwave for 20–30 seconds to bring back the sauce’s smooth texture. No matter how you serve it, this dessert’s comforting charm always shines through!
Complementary Sides
Pairing self-saucing pudding with the right accompaniments can elevate its flavors. Popular choices include:
- Vanilla Ice Cream: The creamy, cold texture balances the pudding’s warmth and richness, especially for chocolate or caramel varieties.
- Whipped Cream: Light and airy, whipped cream adds a subtle sweetness without overpowering the dessert.
- Fresh Fruits: Berries, such as raspberries or strawberries, provide a tart contrast that complements the pudding’s sweetness.
- Custard: For an extra layer of decadence, drizzle warm custard over the pudding.
These sides not only enhance the experience but also add a touch of customization, making every serving special.
Common Mistakes and How to Avoid Them
Overcooking or Undercooking
One of the most frequent pitfalls when making self-saucing pudding is getting the cooking time wrong. Overcooking can dry out the sponge and cause the sauce layer to evaporate, leaving you with a disappointing dessert. On the other hand, undercooking results in a batter-like texture, with the sponge failing to rise properly.
To avoid this, always follow the recipe’s baking times and temperature guidelines closely. Use a toothpick to test the sponge—if it comes out clean or with a few crumbs, the pudding is ready. Additionally, keep an eye on the sauce bubbling at the edges, a clear sign that the dessert is perfectly done.
Incorrect Ingredient Ratios
Achieving the delicate balance between sponge and sauce layers relies heavily on precise measurements. Too much liquid in the sauce mixture can lead to an overly wet dessert, while too little results in a dry, dense pudding. Similarly, using the wrong amount of leavening agent can affect the sponge’s rise, leaving it flat or overly puffy.
To prevent such mishaps, measure ingredients accurately using a digital scale or measuring cups. Double-check proportions when adapting recipes for different serving sizes. By maintaining the right ratios, you ensure that your self-saucing pudding turns out perfectly every time—fluffy, saucy, and undeniably delightful.
Frequently Asked Questions (FAQs)
What makes a pudding ‘self-saucing’?
A self-saucing pudding earns its name because of its unique baking process. During preparation, a liquid mixture—such as water, milk, or juice—is poured over the batter before baking. As the pudding cooks, this liquid sinks to the bottom and transforms into a rich sauce, while the batter rises to form a fluffy sponge layer on top. This delightful duality happens without any additional effort, making the dessert truly self-saucing.
Can self-saucing puddings be made in advance?
Yes, you can prepare self-saucing puddings ahead of time, but it’s best to bake them just before serving to preserve their gooey sauce and soft sponge. For advance prep, assemble the batter and sauce separately in your baking dish, then store it in the refrigerator. When ready to serve, simply bake as directed. Reheating already-baked pudding may alter the sauce’s texture, so it’s worth planning for fresh baking when possible.
How should leftovers be stored?
Leftovers should be cooled completely before storing in an airtight container. Keep them in the refrigerator for up to 2–3 days. To reheat, place a portion in the microwave for 20–30 seconds or in the oven at a low temperature until warm. While the sauce might thicken slightly upon storage, reheating will revive its gooey texture, making the pudding just as enjoyable the next day.
Are there vegan versions available?
Absolutely! Vegan self-saucing puddings are made by substituting plant-based ingredients. Use non-dairy milk like almond or oat milk, vegan butter or coconut oil, and a flaxseed or chia seed egg replacer. Ingredients like coconut cream can add richness to the sauce, while cocoa or fruit flavors keep the taste vibrant. With these swaps, you can create a dessert that’s just as indulgent and satisfying.
What are common flavor variations?
Self-saucing puddings come in many flavors to please everyone. Chocolate is a timeless favorite, while lemon adds a fresh, tangy taste. Caramel gives a rich, buttery sweetness, and spiced versions like ginger or cinnamon bring a cozy feel. For those who like to try new things, fruit-based puddings with berries, orange, or even mango can be a fun twist. There’s no limit to the flavors you can create!
Conclusion
The beauty of self-saucing pudding is in how simple and adaptable it is. From its amazing way of making its own sauce to the many flavors and textures it offers, this dessert keeps winning the hearts of home cooks and dessert fans. Whether you enjoy a classic chocolate version or try lemon or caramel, every bite is warm and comforting.
By learning its history, getting the baking just right, and trying new flavors, you can make this well-loved dessert a regular in your kitchen. So, the next time someone asks, why is it called self-saucing pudding, you’ll not only have the answer but also know how to bake one yourself!

